14 December, 2009

Prepping the engine compartment for re-instal

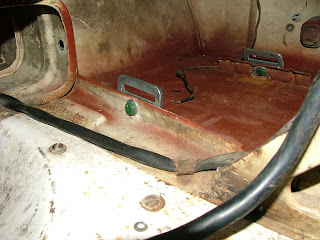
With the engine completed, I started to work on the engine compartment.  I wiped everything down with thinner to remove the grease, and sanded the surfaces with Scotchbrite.  I removed the lights and as many pieces as I could.  I taped off the wires and put a drop cloth over the transmission and suspension.  I sprayed the compartment with a single step paint system I have been using.  I have had great luck with this system and it is reasonably priced.  It's call 2nd Dimension.  It's an acrylic enamel with a hardener.  Covers great and is really tough.


After painting, I installed new engine air seals around the engine tins, I resealed and installed the fuel tank cover, and I reinstalled some of the electrical.  Next I topped of the transmission fluid.  It was only down a 1/2 pint or so.


I removed the starter, cleaned it up with a thinner wipe, painted it with a nice coat of flat black grill paint, cleaned up the electrical terminals, reinstalled the starter and then greased the electrical connections at the starter as well.  Should be good for a long time.  Someone has been in this bus doing lots of work, the starter is a re-manufactured BOSCH.  Every time I uncover something, I discover it has been replaced and is in pretty good condition.  I am very fortunate to have this many new parts on my bus.  It is making my work much easier (and cheaper!).
Next steps: a bit more wiring, tail lights reinstalled, and then I need to make new insulation panels for the upper engine compartment.  The OG (Original German) panels have warped and bowed.  It just wouldn't be right to put it back together with those old crappy panels.  After that, the engine goes back in.  Can't wait.

08 December, 2009

Engine re-do wrap-up

Engine Rebuild Wrap up.
Ok, here is what I found during the engine rebuild.
Remember back when I started working on adjusting the valves?  I found one of the head nuts laying in the valve covers.  This prompted me to question virtually everything with this engine.  What was torqued and what was left un-done.  I couldn't trust it.  Out it came.  Much to my delight, I discovered everything else in the engine was torqued up just right.  The only thing that wasn't torqued correctly was the head nuts on the #3 and #4 cylinder head.  The builder must have gotten distracted and missed the final round of torquing on that side. 
The only other thing I found that wasn't to spec was the deck height.  As I mentioned, someone had been in there adjusting things.  There was a 1.25mm shim at the base of each cylinder that was not stock.  I found that odd, everything else was stock.  After much consternation, I decided to measure the compression ratio.  This is the ratio between the cylinders uncompressed volume and the compressed volume.  The only tricky part is that you need to CC the heads.  This is where you mount the head so the sealing surface of the head to the cylinder is facing up and level.  You then add water or fine oil to the head to determine how much volume it has.  This head volume is needed in the following calculation to determine the compression ratio:
(Note: These numbers are not from my engine, just an example!)

1. Determine the displacement of your engine. Displacement formula is:

BORE X BORE X STROKE X .0031416 = DISPLACEMENT

Example: 92 x 92 x 82 x .0031416 = 2180cc

2. Determine the swept volume of one cylinder:

Example: 2180cc divided by 4 = 545cc

3. Determine the deck volume of each cylinder. The deck volume is the distance from the top of the piston to the top of the cylinder rim when the piston is at top dead center. Measurement is made in thousandths.

Example: on cylinder #1 you measure and find you have .020" deck height.

BORE X BORE X DECK HEIGHT X .01996 = CC"s

Example: 92 x 92 x .020" x .01996 = 3.378cc's

Measure each cylinder.

4. Measure the volume in each cylinder head. To do this, use a piece of plexiglass cut to fit in the cylinder head to cylinder mating area. Drill a 1/4" hole in the center of the plexiglass. Lightly grease the edge of the plexiglass and install in the head. (Spark plug and valves have to be installed) with a syringe graduated in cc's fill the cylinder head chamber up with a light weight oil. Record the measurements. Repeat for other three chambers. Average cc volume of a new head chamber is between 47 and 51 cc's.

5. You now have all the measurements to determine your compression ratio.

one cylinder swept volume + deck cc + head cc
deck cc + head cc

Example: 545 + 3.378 + 48 = 596.378

3.378 + 48 = 51.378
So: 596.378
      51.378    = 11.6:1

Now the original VW 1600 dual port engine was designed to run at about 7.5:1 .  The original calculation I came up with for my engine was 6.63:1  Oddly enough, when I took out the shim at the base of the cylinders, the new compression ratio came out at 7.48:1  It looks like someone add the shims which lowered the compression ratio.  This would not cause any harm, it just would make the engine a bit under powered.  The lower compression ratio would make the engine run a bit cooler, but the 7.5:1 ratio is in a very comfortable range.  This new ratio should work out quite well.  More importantly. I found out the engine is completely stock.  Good to know.

With that out of the way, the rest was a walk in the park.  The engine went back together smoothly and should perform like a new engine.  I am excited to get it back in and running.

28 November, 2009

The Engine is Done!

Well, I got a chance to spend some time finishing things up on the engine re-do.  The intake, carberator, distributor, belt, air cleaner, engine tins, etc. have all been reinstalled.  I adjusted the valves and it is ready for new oil and the re-installation.  For fun, I have both the before and after pics of the engine.  Looks much better and it should be much more reliable and even have a bit of a performance increase with the higher compression ratio.


Next job is to clean and  paint the engine compartment, re-install the engine and take it for a test drive.  I am hoping to do this before the snow starts coming down and the salt trucks come out.

Update Appology

Sorry for not updating the log lately.  My son graduated from the Air Force BMT last week and my wife and I were in San Antonio for the week.  We really enjoyed seeing him and we are very proud of our new Airman!  Now he is off to 20 weeks or so of tech school.

12 November, 2009

Exhaust

I spent a bit of time fiddling with the engine last night, I installed the mounting strap for the generator and installed the exhaust.  It only took three times to get it right.  Every time I would get things tightened up, I would remember some other part that needed to go on before everything was tightened up.  Oh well, some days that's just how it works.  everything worked out pretty well.
 

11 November, 2009

Washer system update

I didn't get a chance to work on the bus last night, but I did reach in there and push the windshield washer button.  I had redone the hoses and fittings back in September.  The moment of truth?  It squirted all the way to the top of the glass, just like it was squirting back on Sept 30 when I finished the re-do.  Very cool,  and very lucky there were no additional leaks in the system.  It has held it's pressure that long!

10 November, 2009

More Assembly

I had a chance to work on the engine a bit last night.  I scraped the main engine cooling shroud clean on the inside.  It had many years of oily greasy built up on the fins.  It should move air much better now.  I then re-installed the oil filler/generator stand, and the generator.  I am waiting for the paint to dry on a couple of the generator mounting parts now.  It sure is nice putting a nice clean engine back together.

03 November, 2009

Moving along on the rebuild.

The engine re-do is coming along quite well.  I have almost everything media blasted and re-painted that needs to be.  I honed the cylinders and installed new rings.  I checked the torque on the rod caps and case nuts and everything seems great.  I re-installed the pistons, rings, and the LH cylinder head.  I discovered someone had been in there and had been messing around with the deck height.  The bottom of the cylinders has been machined off and there was a shim added.  When I re-assembled the engine without the shims, the head sits way too close to the block and the deck height is a bit thin.  I put the shims (1.25mm) back in and the deck height is just right.  The head seems like it is still a bit close to the block, so I installed a shim under the rocker shaft mounts so the rockers would hit the valves correctly.  This shim is about 1.5mm.  You have to wonder what was done to cause these things to be buggered up.  Someone obviously has been "adjusting" this engine to get a bit more power out of it.  They left the bore and stroke stock though.  Very strange.


As I was getting ready to install the RH head, I discovered a crack in the head right at the spark plug hole.  I don't think that is repairable.  After looking the head over completly, I discovered that someone had been in there welding.  There was weld next to the spark plug holes on both cylinder #3 and #4. Time to throw in the towel on that head.


I was fortunate enough to have a friend at work that used to be an air cooled nut and he sold me a mostly complete, stock 1600 that had two good heads for $20.  Can't beat that.  Now I have all kinds of spare parts! 
The heads come off the parts engine and get cleaned up next.  I will probably put the valves and springs from the cracked head into the spare parts head.  The valves that came with the engine in my bus look to be pretty new.

21 October, 2009

Engine cleaning and painting


Over the last few days, I have been cleaning parts, media blasting and etch priming engine tins and generally cleaning and prettying up the engine for re-assembly.  My parts came in from Appletree Automotive, so I am ready to do the re-assembly as soon as things are cleaned and painted.

13 October, 2009

Teardown


Last Saturday I rolled the engine on it's new stand out into the driveway and spent an hour pressure washing and de-greasing.  It really looks great.  I rolled it back in, blew it off with the air hose and started taking it apart.  The engine is in remarkable great shape.  The clearances are very good.  The cylinders have virtually no ridges, there is still hone marks visible in the cylinders!    The gaskets and seals are all hard, but the mechanical stuff looks great.  This looks like a rebuild that was done a  long time ago and it has been run very little since.
I checked and poked and probed to find out if the previous builder had left things un-done like the torques on the left hand head nuts, but my search turned up nothing.  Everything was touqued perfectly except the left hand head nuts.  I am forced to conclude the previous builder did a wonderful job of rebuilding this engine and simply got distracted while torqueing the heads and missed the left one during the final torqueing round.
I also found out that the engine is not the original 1600 that came with the bus.  The engine code tells me it's from a 73-74 Beetle.  I wonder what that story is?  I will never know.  Anyway, I ordered new gaskets, seals, exhaust clamps, hoses, some miscellaneous nuts bolts and screws and a new set of rings.  I don't think the engine needed the rings, the end gaps were pretty good, but I am in this far, I might as well re-do those as well.  I checked the bore, and it is as close to nominal as I can measure.  Should be a great rebuild.  Now for some serious cleaning and painting!

06 October, 2009

An evening in the garage with a cool drink.

I went out to the garage last night poured myself a little drink and sat on my stool looking at the bus, I decided to take out the bolts that held on the rear apron to see what was under there.  They came right out and I could now crawl right into the engine compartment.  Pretty cool, I refreshed my drink and sat back down.  There was a wire dangling off it's clip.  I couldn't help myself, It had to be removed for the engine to come out anyway.  While I am under here, I should just label and disconnect the rest of the wires to the engine.  I sat back down, have another sip.  The pliers were laying next to the stool so I clamped the fuel line and disconnected it and the throttle cable (You know where this is going!)....


The next thing I knew it was an hour later and the enigne was sitting on the jack, the engine compartment was empty and my drink was now warm.  Actually that was a pretty easy job.  It was obvious that someone has been in there not too long ago.  Many of the engine mounting bolts have been replaced.  I can't tell anything about the condition of the engine yet, all I can say is it is pretty packed with crud.  I think the engine and I are going to have a little "come to pressure washer" meeting tonight.  The engine being out will certainly make it easier to paint inside the engine compartment.

05 October, 2009

The dash is complete

I finally finished the dash this weekend. I repainted the top of dash, and began putting the thing back together and I got to thinking: when will I have this dash apart this much again?

I decided I had better top-coat the rest while I was this far in. I removed the rest of the dash parts and wiring and cleaned the front pad with lacquer thinner. I also wiped the glove box cover down, but don't use lacquer thinner for this, it is made of ABS and the thinner will attack it. I used hot soapy water for this. I sprayed it with a vinyl paint. A couple of light coats was all it took. I am really happy with how it turned out.


While I had the rest of the instrument panel out, I decided to fix the crack in the top pad as well.  I had a leather/vinyl patch kit from long ago, so I thought I would give it a shot.  First I cleaned the top pad with lacquer thinner and let it dry thoroughly.  Then I patched it up according to the instructions.  It looked pretty good.  I then put a top coat on this pad as well.  This made the glosses even and also made it match the rest of the newly painted dash parts.  It's not perfect, but it sure looks better than that nasty looking crack/split.  I am sure if one was willing to put in several hours to make it really perfect, it would be possible to make it look even better.  It's good enough for now.


 I re-installed everything I took apart and cleaned under the dash as well. Even the back side of the dash parts are clean now!
I re-glued the cracks I had in the fiber/wood glove box and that will be reinstalled as soon as it dries. Maybe tonight.
After a quick ride to be sure everything was working correctly, I decided it was time to pull that engine to check torques and completeness of re-assembly (see previous post) I put it up on jack stands and removed the rear bumper and battery so far. Let the engine work begin.

30 September, 2009

Washer Hose Replacement

Test
I spent an hour or so removing the top of dash from the bus tonight.  I needed to replace the hoses that feed the windshield washers.  They were old and cracked and were leaking water all over the fuse block!  I could not figure out how I was going to do this without removing the dash, so I just gave up and started removing parts.  There were 8 screws along the windshield that were covered with plastic caps, There were 6 nuts along the rear edge of the top of dash panel, There were two additional nuts holding the grab handle in place.  To get to these screws, I had to take out the glove box, loosen the instrument cluster and lay it against the steering wheel, I then had to remove the sheet metal heater tube covers on both sides.  this let me remove the heat/demist ducts that feed the outer top vents.  This let me get to the two nuts on the outboard edge of the top of dash panel.  It's hard to see these, you just have to feel for them.  I then removed the wiper arms, wiper assy mounting nuts, and the single wiper assy mounting bolt under the dash.  This let me pull the wiper assy rearward so I could get to the hose that feeds the drivers side at the spray nozzle.  This all sounds much worse than it really is.  Not knowing what I was doing, it took about an hour to get everything out.  It will be quite easy to replace the hoses now.  I picked the new hoses up today at Auto Zone for about $15.  that should be enough to do the whole job.  With the top of dash removed, I can sand an repaint the escutcheons and the top of dash also.  They really needed it. 
It may be possible to do this job without removing the top of dash, but I bet it would be a real pain in the butt.
I didn't realize, when I bought the bus, how the windshield washer system worked in a bus.  There is a tank behind the dash panel that you fill with washer fluid.  So far so good.  The deal is that it works best if you fill it just a bit past half full.  The reason for that is that you need to leave room for the air!  Thats right, you need to pump up this little bottle with a tire pump or an air compressor to about 35 lbs ish.   I think is says no more that 43psi or something.  This puts the whole system under pressure and when you push ther wash button, which turns out to be nothing more than a valve, the fluid squirts out onto the glass.   Works great as long as there are no leaks.  My new repair job was still pressurized this morning!  I will keep checking over the next few days to see how long it stays pressurized!

28 September, 2009

First real ride in the bus!

I took the bus for a ride or two this weekend.  I even ran a few errands.  It was lot of fun.  Peoples reactions to an old bus are very interesting.  Smiles, waves, even a bunch of teen age kids in a Jetta honking, and flipping me peace signs!  Very cool.
It started out a bit rough.  I went to leave home and it quit in the driveway!  wouldn't start again.  Acted like it was out of gas.  Very strange.  I removed the air cleaner, held a mirror over the carburetor and moved the throttle to see if the accelerator pump was working; nothing.  I removed the carb and found the float bowl to be empty?  Strange, I checked the fuel / float inlet valve and it was stuck closed.  I cleaned and blew and cleaned and it was still sticking.  I replaced it with a new one from an old rebuild kit I had laying around and it didn't stick any more.  I reassembled everything and it fired right up.  I ended up driving it about 20 miles.  Lovin every minute of it.  A nice day, windows down, bussin around town.
Lets see, what next.  I think I should pull the engine and start checking the torques and thoroughness of that last rebuild.  I can't stop thinking about that loose head nut laying in the valve cover.  This will give me a chance to clean and paint the engine compartment while the weather is still decent as well.

25 September, 2009

Fuel line replacement is done!

I finished the fuel line replacement last night.  It went quite well.  After I removed the old line, I pulled out the pickup tube that enters the bottom of the tank.  This tube was supposed to have a strainer screen on it.  Mine does not.  I am sure it has gone missing somewhere along the forty year journey.  I guess I am not to concerned about that.  As long as I keep a good fuel filter in line and change it often, I think it will be fine.  In fact it may even be better.  I can change the fuel filter from under the hood without having to jack up the car and drain out all the fuel!  Before I reinstalled the pick up tube, I poured about a liter of fuel through the filler neck to "clean out" the tank a bit.  A small amount of "crap" was washed out with it.  That has to be a good thing.

Batery Box Area Preservation

Having read a lot about the battery box area rusting out in these busses, I wanted to try to keep this spot as protected as possible.  One of the main reasons the battery box rusts out is that when you wash the bus, or drive it in the rain, water enters the vents on the top of the rear panels.  This water makes it’s way down to the engine compartment and lands on top of the battery where it picks up any acid residue laying around and washes acidic water into the battery tray.  My solution was to put the battery in a marine battery box.  The next problem was to work out a nifty way to strap down the box.  I used a pair of seat belt adjusters I had laying around and I mounted them to the bus sheet metal by drilling a couple of holes.  I then used a tie down strap to hold the whole contraption in place.  I will need to add a filler block that goes between the battery box top and the battery, so the strap will hold the battery tight.  A loose battery is a battery that is headed for the recycler soon!

24 September, 2009

Woof! Another fuel line.

I had replaced the fuel lines from the hard metal line back to the fuel pump and then to the carb, however, I found another rubber line that comes from the fuel tank to the start of the metal line. It looks pretty old. I don't think it's original, but it's not new either. Like I mentioned earlier, no chances with fuel lines. I drained 10 gallons out of the fuel tank to get ready to replace this line. The tank is empty now. It took 20 minutes to drain all that gas out into a couple of gas cans. There is a screen/filter on the end of the fuel pickup. Draining the tank will now give me a chance to check this as well. Probably a good idea.

More wireing

I spent some time removing the additional wiring that had been added over the years and making sure the wires were bundled and routed so nothing would rub or rattle. I made a nice little mount for a remote high/low beam relay and it looks very professional now. The relay is hot all the time; I don’t think that’s right. I bet it’s hooked up to the wrong pole on the fuse block. I will have to check that. The dash lights are now working, it turns out that the dimmer coils in the headlight switches were pretty fragile and mine had long ago been destroyed. All that means is that I will only have dash lights in the full on position. No big deal for now. That now moves to the “wish” list instead of the “needs to fix” list!

A bit of body work

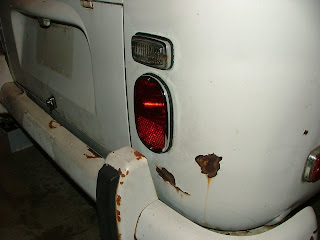
When I got the bus, the bumper at the rear drivers side looked as if it had bumped into something and it was pushed into the body. It had broken the tail light. I hooked up a chain to the top and bottom of the bumper and hooked it around the pull hook on my truck. I chocked the wheels and backed up a few times until I liked the look. I ended up using the truck to apply some pressure to the bumper while I pounded down a couple of the high spots at the edges of the bumper. I removed the pressure and retightened the mounting bolts. I crawled under the back corner and spent an hour or so tapping, pounding, bumping and otherwise finessing the corner of the body into shape. Have a look at the pics. I am pretty happy with the result. I think that this will not need very much filler to make it look good.

Brakes are done

The brake parts showed up and a couple of days of crawling around under the bus found me with a brand new set of brakes that now stop excellent. It is a really good feeling to know it is going to stop when you need it to. After the brake job, I expected the brake lights to start working. Still nothing. I ended up replacing the tail light assemblies with all new parts. Still nothing. With the engine compartment completely re-wired, I headed up front to figure out what was amiss. Turns out there was a blown fuse. I replaced the fuse and it blew right away. What is going on? I removed the fuse block and sure enough, there was forty years of creative wiring behind there. Well, someone had hooked up the rear window defroster to the brake fuse. No big deal, but the wire from the defroster was disconnected from the switch. It turn out that the defroster switch has gone bad and the hot lead is shorted to ground. I disconnected this lead and replaced the fuse and like magic; brake lights.

Fiddly Bitts

All along I have been doing things like oiling hinges, pivot points, door latches, cleaning chrome parts, repairing little things I find like wires pulled off door ground switches, etc. Tedious, but progress goes fast with these little jobs and you can see tangible results quickly.

A quick tune up

While waiting for the new parts, I decided to do a quick once over on the engine. I decided to replace the plugs and plug wires. I was cleaning up the distributor and I discovered the original distributor had a vacuum leak in the advance, so off I went to the bus part store to replace this with a nice centripetal advance model. I disassembled the carb and cleaned it very thoroughly. I replaced the fuel lines and the plastic fuel filter with a nice metal one. I understand engine fires on buses are not uncommon and I didn’t want to take any chances in that department.
Once the tune up was completed, it ran better, but still missed on one cylinder. I decided the valves probably needed to be adjusted. Well, I did find one valve that was too tight, but that wasn’t the problem. I found that one of the head nuts had worked itself off its stud and was lying in the bottom of the valve cover next to its washer! I re-installed the nut and snugged it up a bit and I decided to check the other three nuts I could easily get to. I found them to be way too loose. I snugged them as well and re-assembled the engine. Now I am very suspicious of the engine and I will need to pull it out at some point and check all the Assy. to be sure nothing is left off, or loose. The engine is running great now. I won’t drive it far, but it sure runs great. Lots of power, quiet and smooth. I wish my dune buggy ran that well.

Brakes are pretty bad

The first thing to do was to pull the wheels and brake drums and figure out why the brakes were so soft. I decided to buy new shoes, flex lines to each wheel, new wheel cylinders (all six of them), a new master cylinder, a new fill line and some new brake light switches. I also bought new hub caps, and most of the seals will be replaced. New rear tail lights and front turn signal lenses.

The Bus Project Begins!


Well, as the story goes, there are two wonderful days in the life of every restoration project. The day you tow it home, and the day of the first ride once it is completed (my version anyway!) 7-August- 2009 was the bring-it-home day for my bus. I don’t really know what possessed me to buy a bus. I guess I have always wanted one in some form or another. My first car was a 1968 Beetle. I had it for over 100,000 miles and ten years or so. You learn a lot about a car in that amount of time. What I learned most of all is that I really enjoy working on these crazy quirky vehicles.

As I was headed to go look at the bus, lots of things were running through my head. “Lots of work, Looks like fun, lots of time, really cool, lots of work” etc. By the time I arrived about an hour later, I had pretty much decided I wasn’t going to buy it unless it was really nice. I was not in the mood for a big rust rework project.
Well, it didn’t take too much looking to figure out the bus was structurally sound. There was a bit of surface rust, but there were no holes rusted through. The normal rust spots were sound, the battery box was original and in pretty good shape. The rocker under the slider, the floors under your feet, and even the metal around the front windshield were all very solid. Almost everything was there, it has new tires (still has the blue on the whitewalls!) and the battery is only one year old and holds a charge great. This owner had done a wonderful job of keeping this bus dry. It had obviously been sitting in a barn or garage. The bus has a California RV tag on it from 1970 and it’s a Westphalia conversion with no pop up top. I guess they affectionately call these “Tin top Westies”.
Well after a couple of hours of discussing plans and pricing, the owner was to call me back the next day with his decision. I picked it up the following evening for $1500 and a promise to keep the PO in the loop as I progress through the project.

Clean Up Time


Over the next couple of days, my wife and I cleaned things out the best we could for a first pass, the dogs seem to love playing in the bus and even though it still doesn’t smell very good inside, it sure looks a lot better. I took a bunch of pictures of the inside and outside prior to getting into much of the work so I had a good set of before pics.  You can look at them at my Photobucket page.